Friday, May 30, 2014

S'Mores Bars


It's close to summer time here in Washington and for me, that means Car Show Season, Barbecues and Bonfires with the family.  And what goes better with Bonfires than S'Mores?  If you want that S'Mores taste without the fire, this is a great alternative.

 S'Mores Bars
(As posted here)
1/2 cup softened butter
1/4 cup brown sugar
1/2 cup sugar
1 egg
1 tsp vanilla
1-1/3 cup flour
3/4 cup graham cracker crumbs
1 tsp baking powder
1/4 tsp salt
4 Hershey’s milk chocolate candy bars
1-1/2 cup marshmallow fluff

Beat the butter and sugars until light and fluffy.  Add in the egg and vanilla and beat until incorporated.  Mix in the flour, graham cracker crumbs, baking powder and salt until it all comes together.


Press half of the mix into the bottom of a greased 8x8 pan.  Next, layer in the Hershey bars, then the marshmallow fluff, then flatten out and layer the remaining mix on top.  


Bake for 25 minutes at 350 degrees.  Wait for it to mostly cool before slicing into 16 pieces.


Monday, May 26, 2014

DIY Custom Kitchen Towels


I wanted to add a personal touch to a wedding gift so I made some custom kitchen towels.  I started by purchasing some plain white towels at Target (but you can buy them pretty much anywhere).  The towels I used were cheesecloth.  These worked best because it was a relatively smooth surface.  


I decided to leave the towel folded just as it was in the package for a couple of reasons: 1.) It seemed like the towel could easily be folded back the same way again once washed...no tricky folds.  2.) I waited until the day of the wedding to make these (I am the worst procrastinator EVER)...so this saved me a ton of time.  I could have wasted a TON of time deciding on the best placement and making sure it was perfectly centered.


Next I placed my stencils onto the towels.  I made the stencils using my Silhouette Cameo and contact paper.  I found contact paper to be a cheap and easy solution for making stencils (you can see mine had a fun print but that obviously isn't necessary).  I placed a piece of cardboard under the layer of towel I would be painting on...this way the paint won't leak through onto other parts of the towel.


I used Behr paint from Home Depot because this is just what I happened to have on-hand. I also used a stencil brush that can be purchased at your local craft store (I got a pack of 2 for under a dollar).


Next just dab your paint onto your stencil and be sure not to use too much paint.  I used two different colors so just make sure the first color is dry before moving onto the second color.  I generally remove my stencils before the paint is fully dry because I am too impatient.  But it is probably best to wait so you don't risk smearing...which is why this is now a set of 2 towels instead of 3.


Here are the finished products!  These were the prefect addition to the gift basket for the happy couple.  While these were a wedding gift, you can use your imagination and create great custom towels for any occasion.

Wednesday, May 14, 2014

Runyon's Rub - BBQ Rub for any Meat

This year for Christmas, we made gift baskets for our close friends and family.  The baskets included cookies, candies, snack mix, and homemade Cocoa mix, Apple Pie Moonshine and BBQ Rub.


I've already shared my recipe for Cocoa Mix but since it is grilling season, I thought I would share the BBQ Rub mix.  We have used this rub on Beef and Pork Ribs, Chicken, Steaks and Fish.  It really gives the meat a great flavor and  nice glaze on the outside.


Runyon's BBQ Rub
1/4 Cup Salt
1/4 Cup Brown Sugar
2 tbsp Sugar
2 tbsp Black Pepper
2 tbsp Onion Powder
2 tbsp Garlic Powder
2 tbsp Cumin
1 tbsp Chili Powder
Mix all the ingredients together.  Sprinkle and rub the mixture onto the meat and let sit for at least an hour or overnight.  Grill, bake or pan fry the meat as desired and enjoy.


Friday, May 9, 2014

Block Photo Display


I wanted to make something fun for my sister's birthday and I knew it would go over well if it involved my boys.  She is a very proud aunt so this was a perfect gift!

To start this project I needed to make the wire photo holders.  I used OOK brand of wire that I purchased at Home Depot but you could also use wire from the craft store that is intended for jewelry.  I began with a 14" piece of wire and started to make the heart shape.  

I found these small pliers (in the jewelry/craft section of Wal-Mart) very handy when shaping the wire.

After I shaped the heart, I wrapped the wire around a small paint bottle to get the circle shape.  This also helped to keep the circle shape a consistent size.  The following pictures will help give you an idea of the process I went through to get this shape.  While this is the shape I choose, you could easily make your own design here.


The next step was to prepare my block.  While it may be odd in other homes...in my home I already had a 14" section of a 2x4 cut, sanded and painted black just laying around waiting for a purpose.  I decided to distress the block by sanding the edges since 2x4s are generally pretty rough - this made it look intentional.  Next I used my Silhouette Cameo to cut out vinyl letters and place them on the block.  I decided to spray on a clear coat to seal the block before moving onto my next step.


Next I drilled small holes where I wanted my photo holders to be placed.  It is important to drill the holes just slightly larger than the wire - you want a snug fit.  Once the holes are drilled, I used my E6000 glue (found at all craft stores) to glue the wire photo holders in place.


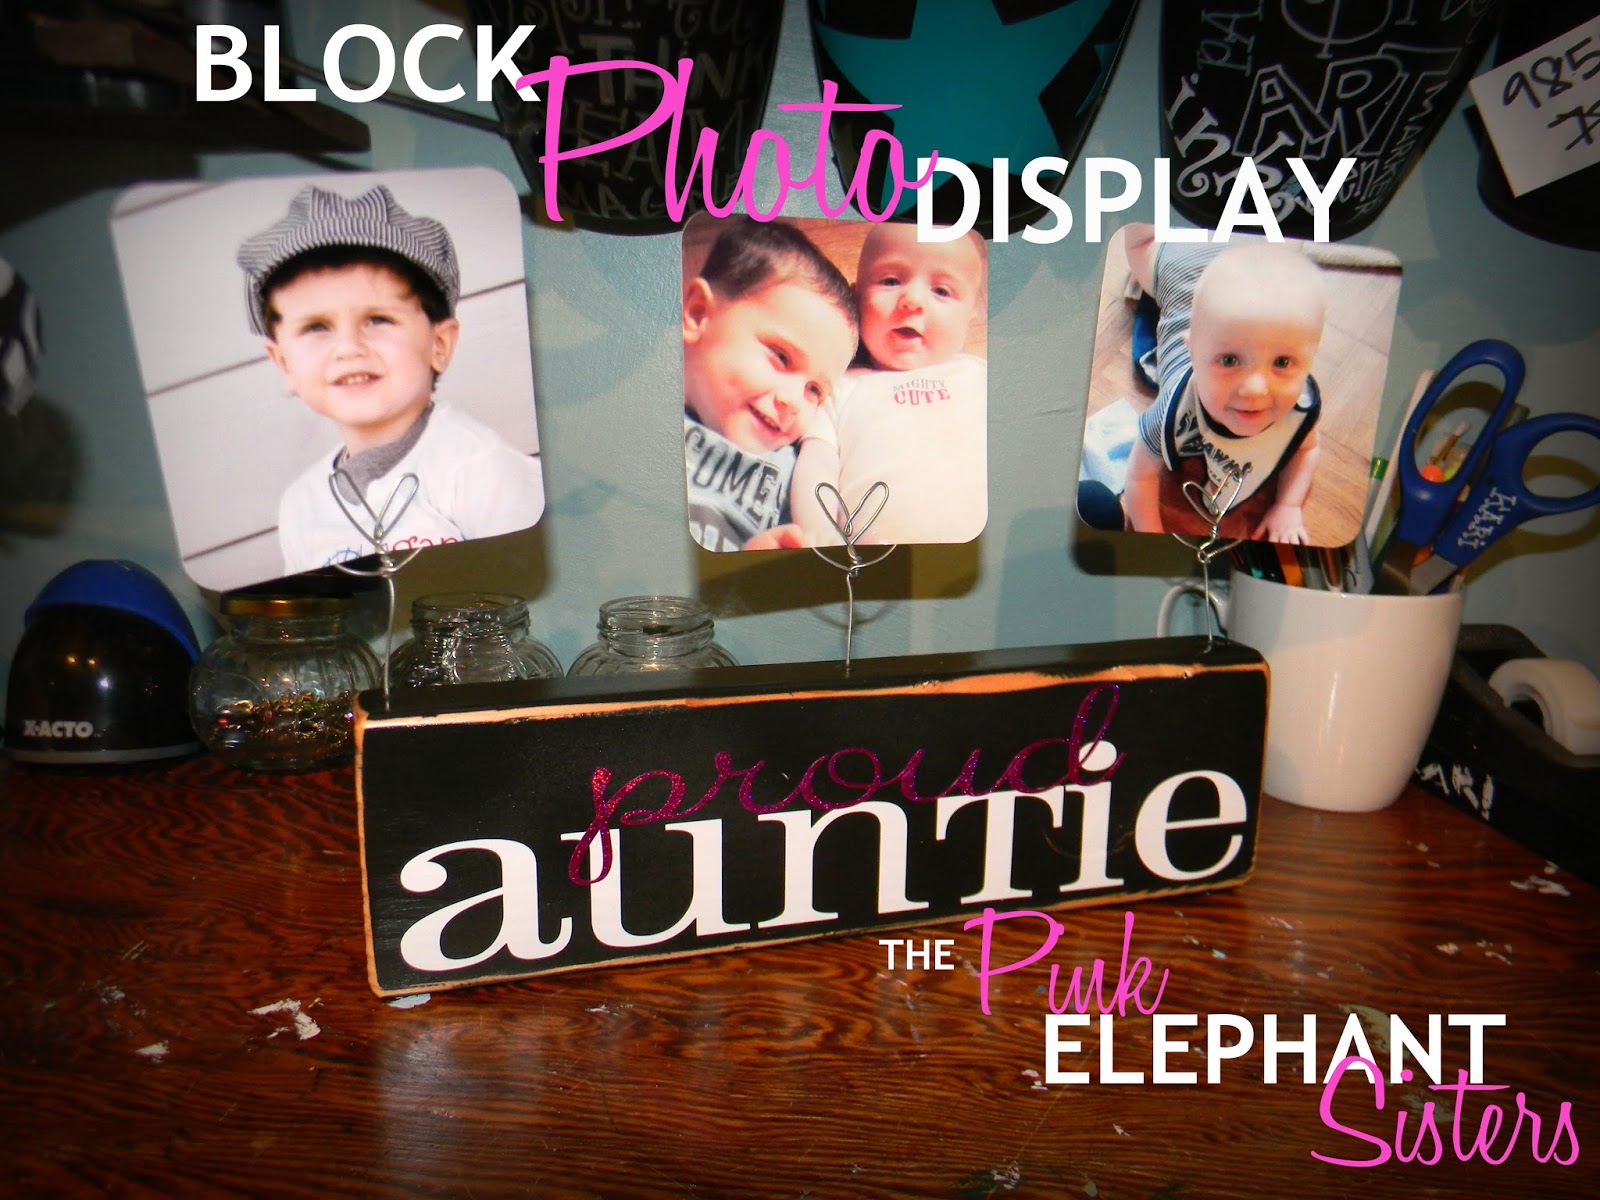
Now you can decide to place the photos so just a little wire heart shows or just the circle.


This is a fun and thoughtful gift that is easy to make.  You can easily change the wording to fit your needs.  It can sit nicely on a desk or shelf and the photos can be easily changed.  You could also use this to hold notes or messages.  I hope this inspires you to make something amazing!