We are back folks! I know I have sort of hijacked the blog. It has been all weight loss and diabetes information for six months or so. It has consumed my life too but now I am back into crafting, sewing and cooking. As always, the blog will reflect what is going on our lives.
Kari and I made plans to meet up and get a few projects banged out in one day. We had a very productive Saturday, even with her 3 boys there. I honestly don't know how she does it. They wear me out. Her boys are almost 5, almost 2 and 1 month old. Our first project is the one I am going to share today.
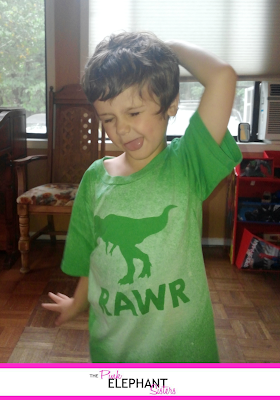
Isn't our model just so precious?!?
These DIY Bleach shirts were inspired by this pin. The supplies are simple.
Bleach
Spray Bottle
T-Shirt (darker colors work better)
Cardboard
Stencil
Start by placing the cardboard inside your shirt and make sure it is flat. You can iron if you want but, umm, no.
Next, you want to lay out your stencil or design.
We used vinyl cut on a Silhouette machine.
You just want to make sure it is straight and positioned where you want it.
Just spray a fine mist of the bleach from the squirt bottle. We did 3 or 4 squirts and you can see it starts to change quickly. Dab any pooling bleach with a paper towel
In just 2 or 3 minutes, you can remove the stencil and see the results.
After you remove the stencil, rinse the shirt thoroughly in cold water.
Hang the shirts to air dry.
After they dry for a bit, run the shirts through the washer and dryer on a normal cycle, just the shirts.
And Tah-Dah, there you have a simple, quick DIY shirt made from things you have in your house already.


No comments:
Post a Comment