Showing posts with label DIY. Show all posts

Thursday, February 25, 2016

Quiet Book for Nephew #2

 If you have been reading this blog since the beginning, you may remember the Quiet Book (or sometimes called Busy Book) I made for Logan, Nephew #1.  I gave it to him for his 2nd Birthday so I knew I had to do the same for Nephew #2, Landon.  I have roughly 16 months until I have to have my final one done for Nephew #3, Leo.


Here is the cover of Landon's book.  I used denim, felt, bias tape a button and an elastic hair tie.  You can see a snarl on the bottom.  I was having problems with the tension in my machine and actually broke the bobbin.  Next, the screw broke that holds the presser foot.  It was a hot mess, to say the least.  His name is made of felt that I fabric glued.  I sewed a hair tie to the back and then used a button to secure it shut.
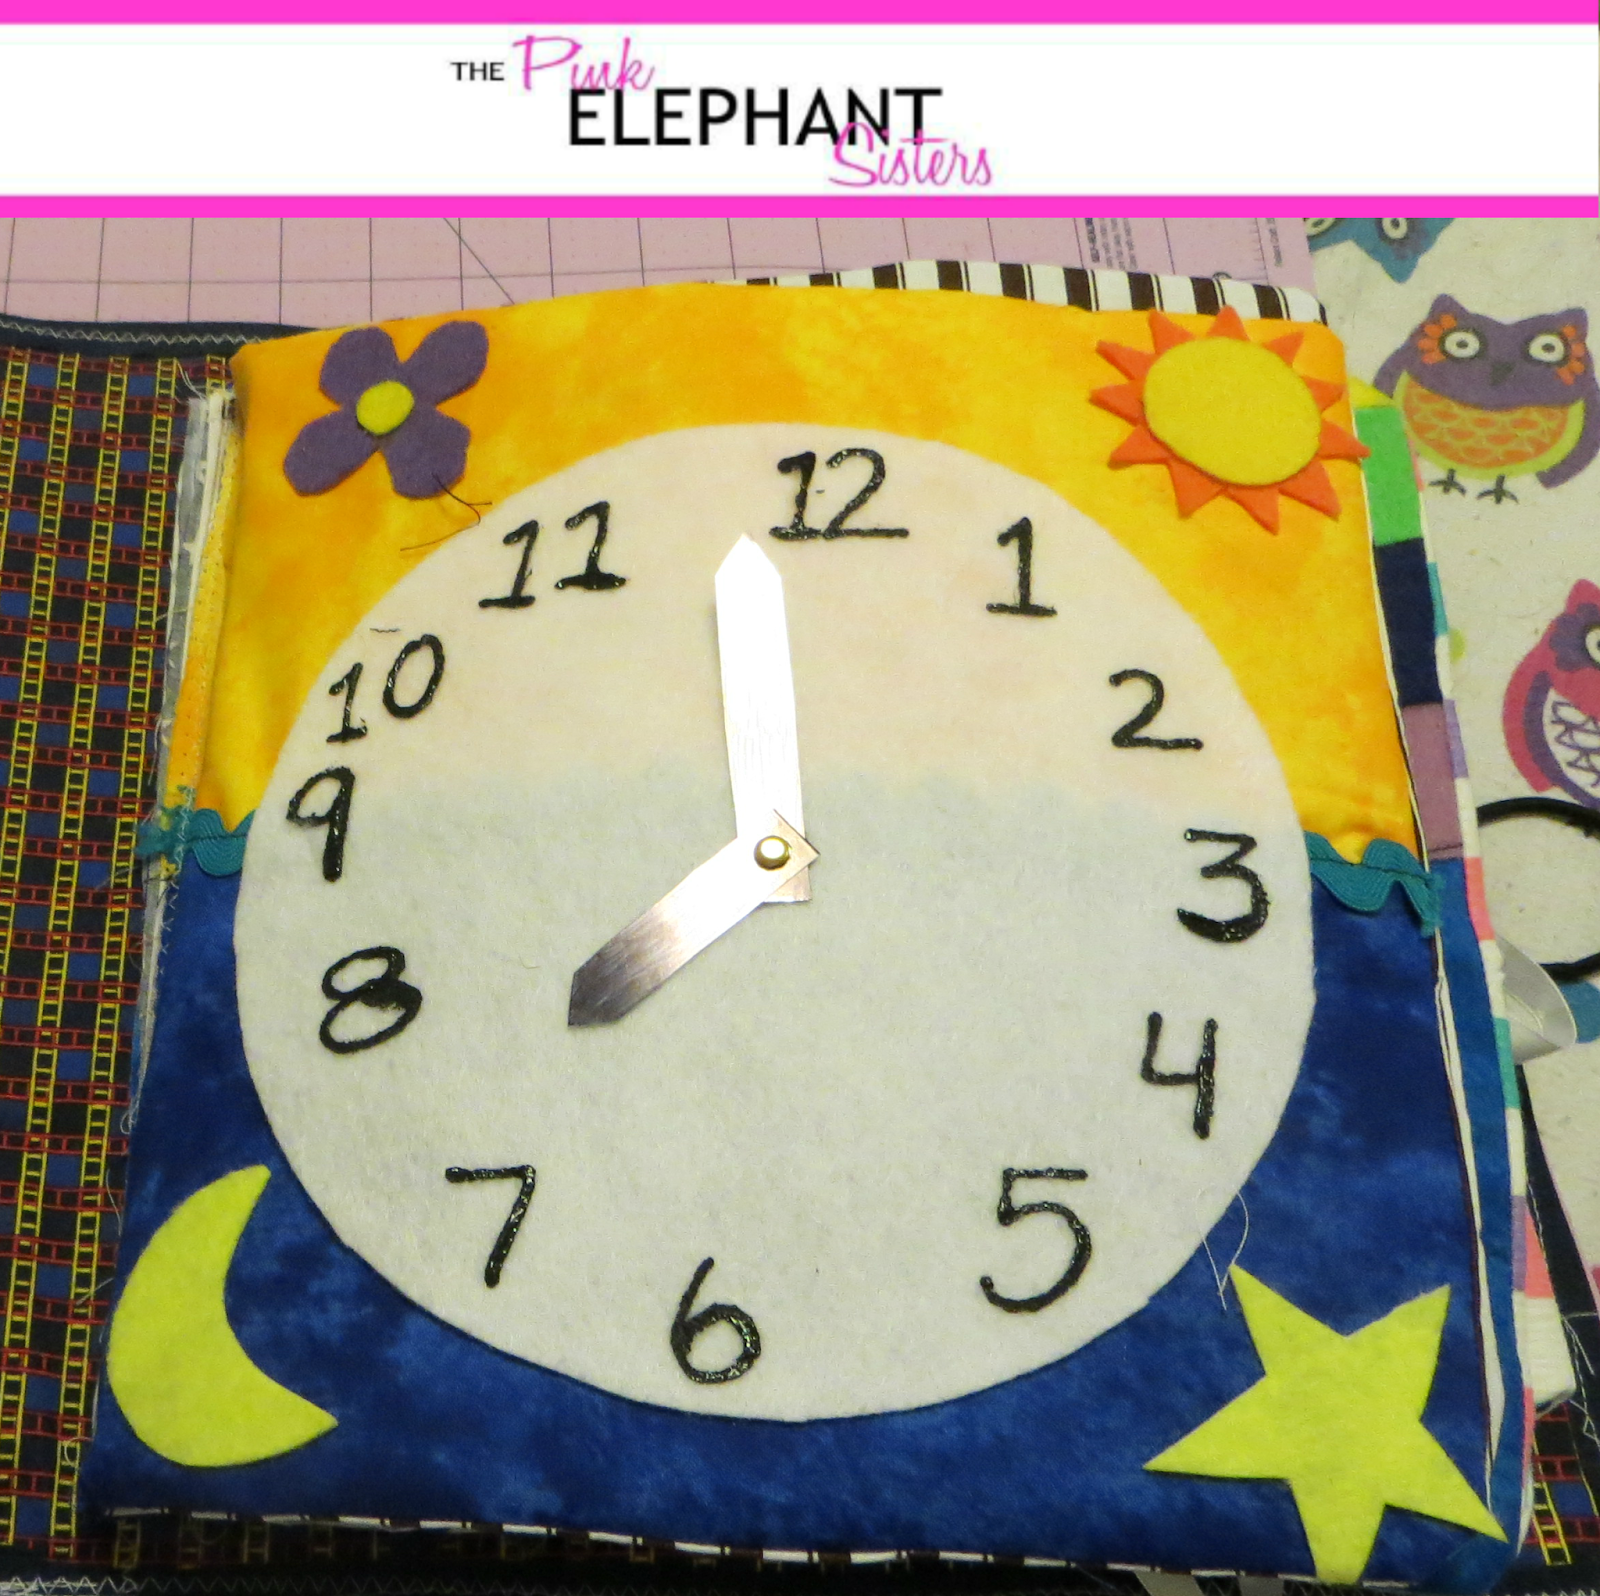

Page #1 is a clock page.  The hands can move and are made of plastic that i colored with a black sharpie.  The face is felt with fabric paint.  The background is meant to represent night and day.  It was the first page I put together and one of my favorites.


This is the first of 3 two-page spreads.When Landon was younger, he used to throw socks everywhere.  So, when I saw this idea online I knew I had to try.  I redid this page a few times.  I screwed up the door and it was trial and error with the socks.  I needed a strong enough magnet but thin enough to not make the page bulky.  There are three sock cut outs in each pattern.  One to glue to the page with a strip magnet underneath and the other two get sewn together with a small strong magnet I got at Harbor Freight.  He can put them in the dryer or the basket or keep them on the magnetic page.


Nest is a puzzle kite.  Nothing too extreme.  However, I learned from Logan's book that all parts should be attached to the book somehow.  Each piece has a string of rik rak sewn to it then they are sewn to the page under the bow.  The puzzle pieces are felt and there is a small piece of velcro on the back of each.  There is a full kite shape underneath that the velcro sticks to.


I am not overly thrilled with this page but I do love the kid in the puddle.  He is made from felt, hand stitched and so cute.  This should help him learn his colors and how to spell them.


This is the counting page.  I used the same fabric as Logan's counting page in his book.  It was fabric my mom gave me that she had for years.  I simply strung beads and buttons on ribbon, glued felt numbers and sewed the ribbon to the page.


This is the girliest page in the book.  It should help him learn how to use buttons.  Each flower has a slit in it with rik rak glued to it.


This pizza page should also help him with counting.  Plus, who doesn't love pizza?  I made sure the pieces were attached to the book but they have since been ripped out by him so I will have to figure something better out.  The pizza is made of felt and glued together.


The shapes and textures on this page are really cute.  I got the textured felt on clearance at Wal-Mart for 10 cents a sheet.


I call this final page the Puppy Page.  It will help him learn to use a slide closure.  It's so cute and was really easy.  The dog is made of felt and the spots are glued on.  I got the dog collar at the dollar store.  

All in all I love the book.  It took many hours and a lot of supplies but my nephews are worth every pin prick.

Thursday, August 27, 2015

Fall Decor - Fabric Pumpkins


These Fabric Pumpkins were the second project we completed on our epic crafting day.  Check them out and see if you want to make them yourselves or if you just want to purchase one of these, go see Kari at the Cedarville Barn Autumn in the Country event in Oakville on Friday and Saturday September 25th and 26th from 10-5 or at the Country Chicks Harvest Fair at the Southwest Washington Fairgrounds on Friday and Saturday October 2nd (10-6) and 3rd (10-4).  Both of these events are really a great place to get inspiration and some really awesome handmade goods from talented people.  On to the craft...


I have to admit this is one of my favorite projects that we have done.  It was fun, quick and pretty easy.  We got our inspiration from here.  The best part for me was picking out the fabrics.  You can choose 1, 2 or 3 different fabrics.  You could do more but I think they look best with 6 sections.  No matter how many fabrics, you want your total overall size to be about 24" wide and no more than 12" tall.  These make a good size pumpkin.  Any taller and you will have some trouble with getting the long needle through.

Chose your coordinating fabrics and iron them out.  Measure your pieces on the reverse side and mark were you need to cut.  These pieces are 13 1/2" by 4".  Remember when I said no longer than 12"?  Seriously, no longer than that.  It was really difficult later.

Once your pieces are cut, match them up and sew the long sides together.   You will end up with all six pieces in one long sheet.  Now sew the ends together to form a cylinder shape.

Thread a needle and double the thread.  Tie off the thread and begin sewing one end of the cylinder closed using a running or basting stitch.  Basically just in one side and then in the other side.  At the end, pull the thread taut and tie off.  This will gather the fabric in a tight zig zag.  This is the bottom of the pumpkin.  Flip the fabric right side out and you should end up with a sack like shape. 
Stuff the sack with Poly-Fil or other soft fiber filler.  Take the same thread from before and do another running or basting stitch around the edge of the open side.  Unlike the bottom, this stitch runs around the rim and then pull it taut.  This will mostly close the other side, leaving you with a stuffed cylinder and small opening.

Take a long, slim needle (5" or so) and thread it with embroidery thread of a corresponding color.  Tie off the end and start in the center of the first side you sewed together, the bottom. Push it through and out the small opening in the top.  Go around the outside of the pumpkin, on a seam.  Continue this process for all 6 seams, pulling each tight, tufting the fabric.  Do not tie this off yet.

Use a small piece of felt, about 2 1/2" x 3 1/2".  Fold it in half and using the same black thread from before, use a whip stitch to close the top and open side.  Leave the bottom open.  You can turn the felt right side out or leave it with the stitching on the outside.  Next you will fill it with the Poly-Fil or other filling, then stitch the bottom closed.  Take the large needle and embroidery thread and attach the stem.  You will run it through the bottom and top a few times to secure it before tying it off.

 Here are some of the finished pumpkins.  As you can see, you can use many different fabrics, textures and sizes.  Variety is the spice of life, right?

 We both disliked this fabric with anything else but it works great on it's own.

 Pardon the multiple backgrounds.  I did some of these at Kari' house, a few in my bedroom and a few in my living room.  It's a great craft to do while watching tv. I love this green pumpkin.  The leaves and stem are precious.

 I got lucky and found this sequined fabric in the remnant bin at JoAnn's.  It looks fabulous.

You can see the different sizes and variations I used.  Did I mention I loved this craft?!?!?!

Wednesday, August 12, 2015

DIY Bleach Shirts

We are back folks!  I know I have sort of hijacked the blog.  It has been all weight loss and diabetes information for six months or so.  It has consumed my life too but now I am back into crafting, sewing and cooking.  As always, the blog will reflect what is going on our lives.

Kari and I made plans to meet up and get a few projects banged out in one day.  We had a very productive Saturday, even with her 3 boys there.  I honestly don't know how she does it.  They wear me out.  Her boys are almost 5, almost 2 and 1 month old.  Our first project is the one I am going to share today.
Isn't our model just so precious?!?

These DIY Bleach shirts were inspired by this pin.  The supplies are simple.


Bleach
Spray Bottle
T-Shirt (darker colors work better)
Cardboard
Stencil

 Start by placing the cardboard inside your shirt and make sure it is flat.  You can iron if you want but, umm, no.

Next, you want to lay out your stencil or design.  


We used vinyl cut on a Silhouette machine.


You just want to make sure it is straight and positioned where you want it.


Just spray a fine mist of the bleach from the squirt bottle.  We did 3 or 4 squirts and you can see it starts to change quickly.  Dab any pooling bleach with a paper towel


In just 2 or 3 minutes, you can remove the stencil and see the results.


After you remove the stencil, rinse the shirt thoroughly in cold water.


Hang the shirts to air dry.


After they dry for a bit, run the shirts through the washer and dryer on a normal cycle, just the shirts.

And Tah-Dah, there you have a simple, quick DIY shirt made from things you have in your house already.

Monday, April 6, 2015

Repurposed Photo Frame Jewelry Hanger

Another easy project off my to do list and I made it all with stuff I had already at home.

About 7 years ago, we put our house on the market.  Our Realtor told us to unclutter and remove all personal photos.  We did and when our house didn't sell, we never put them back up.  Part of it was laziness and part of it was depression because we really wanted to move.  Well I finally got around to unpacking them and hanging most of them back up.  In the packing however, I had 2 frames that had broken glass.  I removed the glass and saved the frames to make this project.

Materials you will need are:
Frames
Scrapbook or wrapping paper
Scissors
Ink Pen
Tape
Lace

By the way, did you notice my repurposed old trunk coffee table?  We bought the trunk at a garage sale over 10 years ago.  It holds DVDs, VHS tapes and photos.  Roger bought a movers dolly at Harbor Freight and we placed the trunk on top.  Easy peasy and so useful.  I like it because I can move it easily and it has a cool story.

First step is to cut your paper and your lace.  I used a map scrapbook paper I had and cut out the west coast, since tat's where I am from.  I had an extra piece of lace from my Lace Painted Dining Table Project that I used.

I used the tape to hold the lace in place as I wrapped it around the scrapbook paper.  Then I just put them back in the frame.

For the earrings, I just hung them on the lace.  For the necklaces, Roger got me some S hooks at Wal-mart for 97 cents for 4.  I love the look of these and they dress up my bedroom nicely.