Showing posts with label Sewing. Show all posts

Thursday, February 25, 2016

Quiet Book for Nephew #2

 If you have been reading this blog since the beginning, you may remember the Quiet Book (or sometimes called Busy Book) I made for Logan, Nephew #1.  I gave it to him for his 2nd Birthday so I knew I had to do the same for Nephew #2, Landon.  I have roughly 16 months until I have to have my final one done for Nephew #3, Leo.


Here is the cover of Landon's book.  I used denim, felt, bias tape a button and an elastic hair tie.  You can see a snarl on the bottom.  I was having problems with the tension in my machine and actually broke the bobbin.  Next, the screw broke that holds the presser foot.  It was a hot mess, to say the least.  His name is made of felt that I fabric glued.  I sewed a hair tie to the back and then used a button to secure it shut.


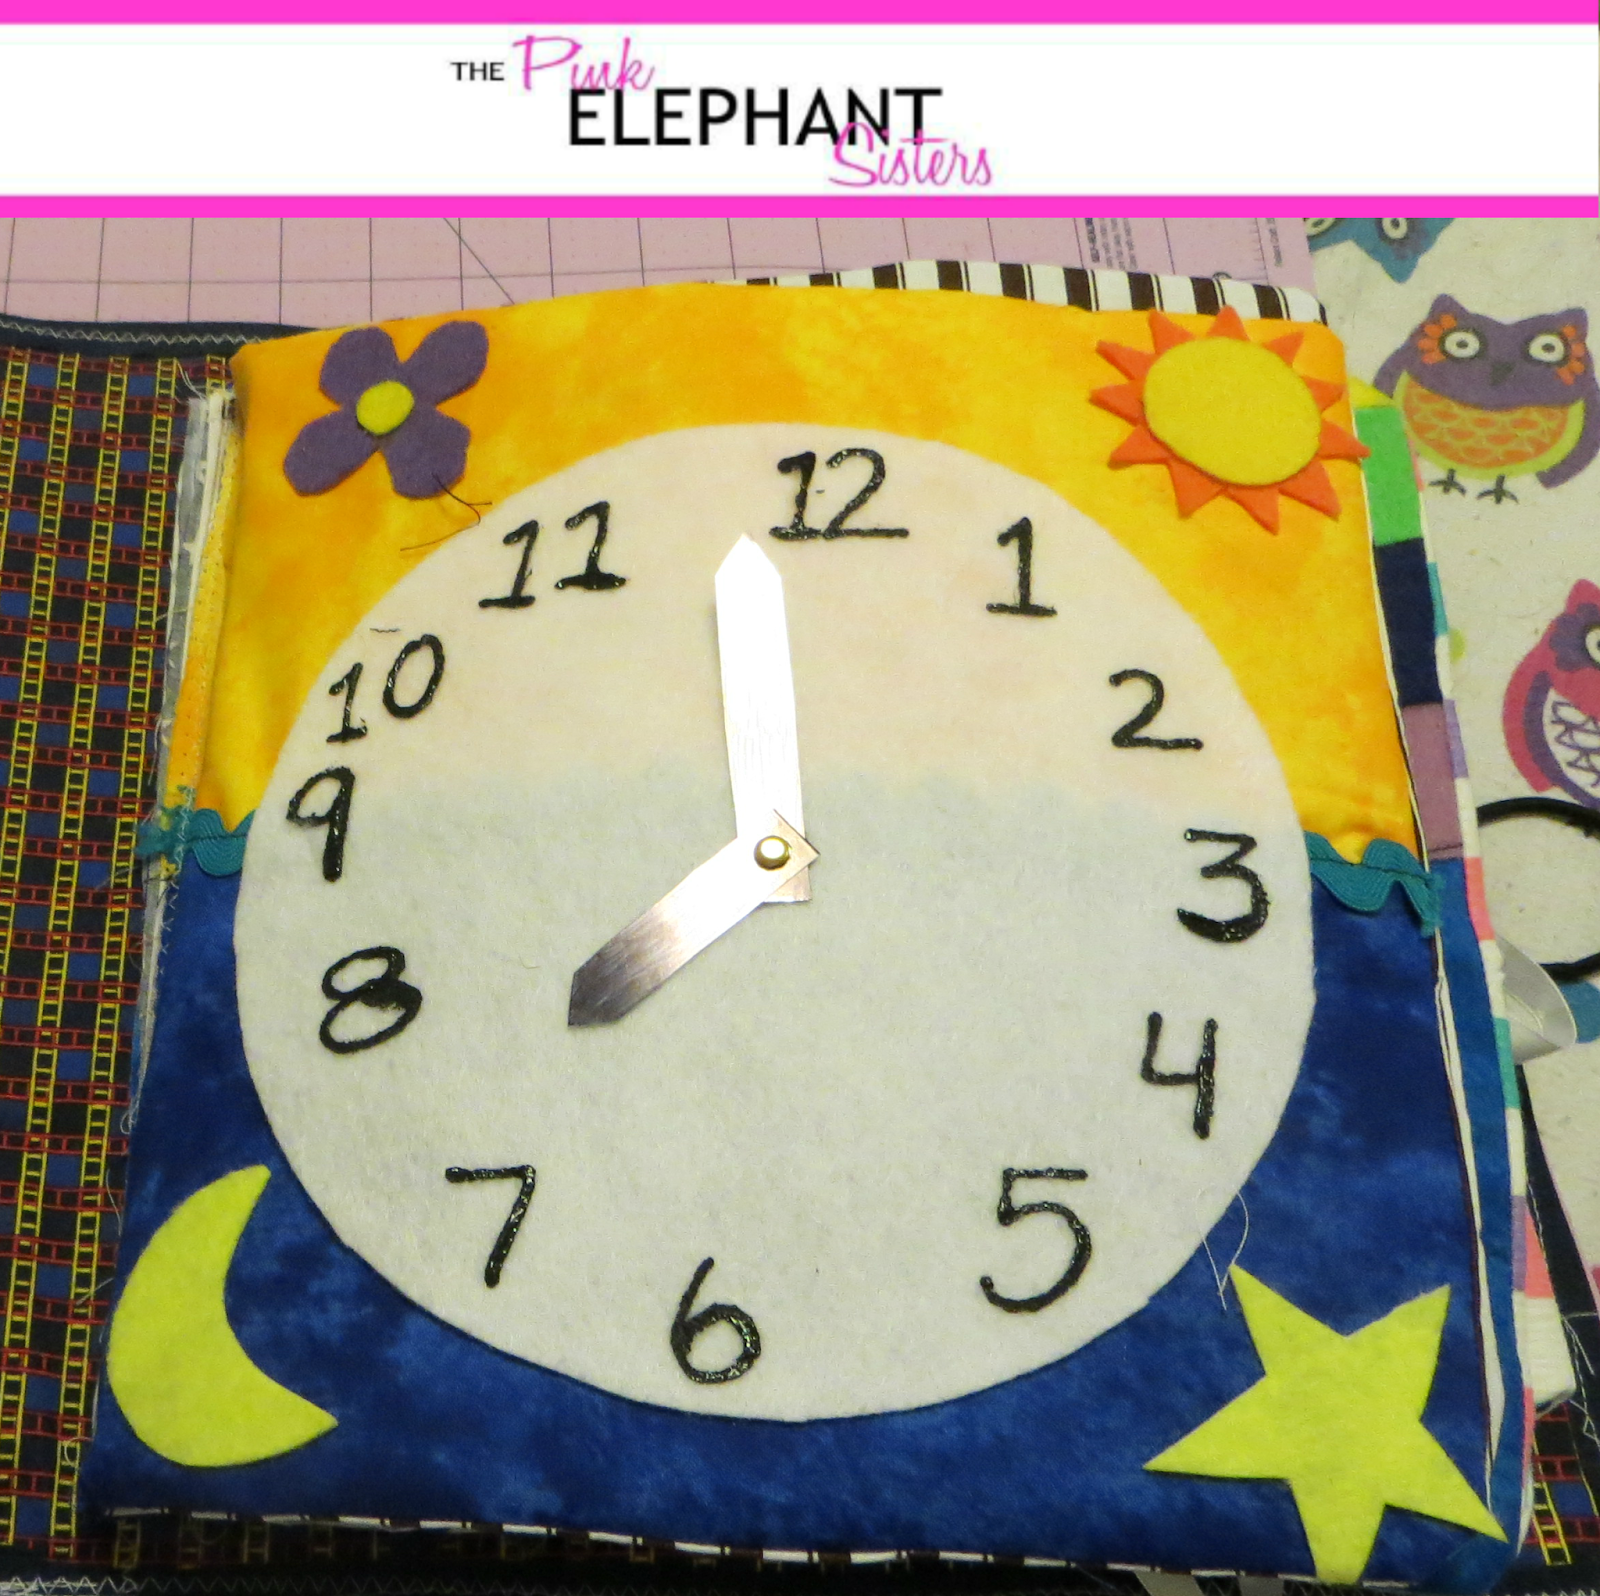
Page #1 is a clock page.  The hands can move and are made of plastic that i colored with a black sharpie.  The face is felt with fabric paint.  The background is meant to represent night and day.  It was the first page I put together and one of my favorites.


This is the first of 3 two-page spreads.When Landon was younger, he used to throw socks everywhere.  So, when I saw this idea online I knew I had to try.  I redid this page a few times.  I screwed up the door and it was trial and error with the socks.  I needed a strong enough magnet but thin enough to not make the page bulky.  There are three sock cut outs in each pattern.  One to glue to the page with a strip magnet underneath and the other two get sewn together with a small strong magnet I got at Harbor Freight.  He can put them in the dryer or the basket or keep them on the magnetic page.


Nest is a puzzle kite.  Nothing too extreme.  However, I learned from Logan's book that all parts should be attached to the book somehow.  Each piece has a string of rik rak sewn to it then they are sewn to the page under the bow.  The puzzle pieces are felt and there is a small piece of velcro on the back of each.  There is a full kite shape underneath that the velcro sticks to.


I am not overly thrilled with this page but I do love the kid in the puddle.  He is made from felt, hand stitched and so cute.  This should help him learn his colors and how to spell them.


This is the counting page.  I used the same fabric as Logan's counting page in his book.  It was fabric my mom gave me that she had for years.  I simply strung beads and buttons on ribbon, glued felt numbers and sewed the ribbon to the page.


This is the girliest page in the book.  It should help him learn how to use buttons.  Each flower has a slit in it with rik rak glued to it.


This pizza page should also help him with counting.  Plus, who doesn't love pizza?  I made sure the pieces were attached to the book but they have since been ripped out by him so I will have to figure something better out.  The pizza is made of felt and glued together.


The shapes and textures on this page are really cute.  I got the textured felt on clearance at Wal-Mart for 10 cents a sheet.


I call this final page the Puppy Page.  It will help him learn to use a slide closure.  It's so cute and was really easy.  The dog is made of felt and the spots are glued on.  I got the dog collar at the dollar store.  

All in all I love the book.  It took many hours and a lot of supplies but my nephews are worth every pin prick.

Thursday, August 27, 2015

Fall Decor - Fabric Pumpkins


These Fabric Pumpkins were the second project we completed on our epic crafting day.  Check them out and see if you want to make them yourselves or if you just want to purchase one of these, go see Kari at the Cedarville Barn Autumn in the Country event in Oakville on Friday and Saturday September 25th and 26th from 10-5 or at the Country Chicks Harvest Fair at the Southwest Washington Fairgrounds on Friday and Saturday October 2nd (10-6) and 3rd (10-4).  Both of these events are really a great place to get inspiration and some really awesome handmade goods from talented people.  On to the craft...


I have to admit this is one of my favorite projects that we have done.  It was fun, quick and pretty easy.  We got our inspiration from here.  The best part for me was picking out the fabrics.  You can choose 1, 2 or 3 different fabrics.  You could do more but I think they look best with 6 sections.  No matter how many fabrics, you want your total overall size to be about 24" wide and no more than 12" tall.  These make a good size pumpkin.  Any taller and you will have some trouble with getting the long needle through.

Chose your coordinating fabrics and iron them out.  Measure your pieces on the reverse side and mark were you need to cut.  These pieces are 13 1/2" by 4".  Remember when I said no longer than 12"?  Seriously, no longer than that.  It was really difficult later.

Once your pieces are cut, match them up and sew the long sides together.   You will end up with all six pieces in one long sheet.  Now sew the ends together to form a cylinder shape.

Thread a needle and double the thread.  Tie off the thread and begin sewing one end of the cylinder closed using a running or basting stitch.  Basically just in one side and then in the other side.  At the end, pull the thread taut and tie off.  This will gather the fabric in a tight zig zag.  This is the bottom of the pumpkin.  Flip the fabric right side out and you should end up with a sack like shape. 
Stuff the sack with Poly-Fil or other soft fiber filler.  Take the same thread from before and do another running or basting stitch around the edge of the open side.  Unlike the bottom, this stitch runs around the rim and then pull it taut.  This will mostly close the other side, leaving you with a stuffed cylinder and small opening.

Take a long, slim needle (5" or so) and thread it with embroidery thread of a corresponding color.  Tie off the end and start in the center of the first side you sewed together, the bottom. Push it through and out the small opening in the top.  Go around the outside of the pumpkin, on a seam.  Continue this process for all 6 seams, pulling each tight, tufting the fabric.  Do not tie this off yet.

Use a small piece of felt, about 2 1/2" x 3 1/2".  Fold it in half and using the same black thread from before, use a whip stitch to close the top and open side.  Leave the bottom open.  You can turn the felt right side out or leave it with the stitching on the outside.  Next you will fill it with the Poly-Fil or other filling, then stitch the bottom closed.  Take the large needle and embroidery thread and attach the stem.  You will run it through the bottom and top a few times to secure it before tying it off.

 Here are some of the finished pumpkins.  As you can see, you can use many different fabrics, textures and sizes.  Variety is the spice of life, right?

 We both disliked this fabric with anything else but it works great on it's own.

 Pardon the multiple backgrounds.  I did some of these at Kari' house, a few in my bedroom and a few in my living room.  It's a great craft to do while watching tv. I love this green pumpkin.  The leaves and stem are precious.

 I got lucky and found this sequined fabric in the remnant bin at JoAnn's.  It looks fabulous.

You can see the different sizes and variations I used.  Did I mention I loved this craft?!?!?!

Friday, March 6, 2015

Lessons Learned From Making a Baby Quilt

It's time for us to take a break from all the Diabetes and Diets because we here at the Pink Elephant Sisters are more than just that.  We are crafty chicks.  If you have ever wanted to make a quilt, or wanted to prove that we are not perfect, this is the post for you.  While making a baby quilt doesn't seem all that difficult, and this wasn't even our first time doing it, we managed to run into a few problems and learned some lessons along the way.  


The first place to start is choosing your fabrics.  To me, this is the funnest part of the whole process!  I could walk the aisles of the fabric store for hours!  However, I have 2 small boys that don't care for that certain store, so they force me to make quicker decisions.  I came home with 7 different fabrics that I strategically selected.  And here is where we learned our first lesson: always have back-up fabric.  Once I got them home and shared them with my sister, we decided that they just didn't all work.  But luckily I have a rather large stash of fabric and found the awesome owl fabric that I forgot I had.  Easy solution to our first problem.


Now comes, in my opinion, the worst part of the process: cutting out all of the squares.  It is SO time consuming!  This is where we learned our second lesson: whenever possible, purchase pre-cut squares.  When we made a Dr. Suess themed quilt for my son, we purchased pre-cut squares on etsy.com (because the local craft store didn't have Dr. Suess fabric at that time)....we had no idea how great they were until we began cutting all of the squares this time.


Next we laid all of the square out on the floor to decide on a pattern.  We definitely compromised on this part.  I love a random pattern, but Kristy's OCD demanded that there be a very strict pattern.  As you can see, she won.  The lesson we learned on this step: don't let your 4 year old anywhere near this.  While he seems to be just innocently walking by...nope.  He purposely kept moving the blocks around with his feet and messing up the pattern.  So he was then banned from the room!  :)


This next step, sewing all of the squares together to make rows, is where we learned out biggest lesson: don't trust your sister's measurements!  While we agreed on a 1/2" seam allowance, I assumed that Kristy would actually measure...nope.  Kristy started at the top, I started at the bottom and we met in the middle.  Sounded like a grand plan at the time.  We would do half of the sewing so it would be done faster, right?...nope.  After both halves were completely finished, Kristy said "why are my seams smaller than yours?"  Well, that is because she was actually sewing with a 1/4" seam allowance instead of 1/2".  This was a hard blow after working on this for several hours that day.  We ended up just re-sewing her part to make the seam allowance the 1/2" it should have been.  It all worked out but this was a lesson learned the hard way for sure!


The next step was to sew the diagonal lines to hold together the quilt front we just made, the batting, and the backing of the quilt.  When we made the Dr. Suess quilt we did the diagonal lines as well and I don't remember having any trouble.  However, this time it was a struggle (I know, seems to be an ongoing theme for this quilt, huh?).  About the 5th line into it, I kept getting puckers on the back.  It didn't seem to matter how well I pinned it, the fabric just kept bunching up.  


After several days of struggling, I learned our next lesson: ask your mother-in-law for help!  I wish I would have asked her sooner because she had one of these amazing little tools, the quilt basting gun.  This thing was a life saver!  It punched these purple little plastic things through the quilt and held it together perfectly.  I finished sewing the quilt in no time at all...and no more puckers!


Next I just needed to cut off the excess batting and add a border of some kind.  Luckily, we didn't seem to have any trouble of this step (surprising, I know).  We used double fold bias tape and it worked great and was easy to sew. 


Of course, in true Kari-style, I finished it the day of the baby shower!  
Either way, all lessons learned, our cousin loved the quilt we made for her new baby girl.  Now hopefully we will remember these lessons for when we make a quilt for my new baby boy!


Tuesday, December 11, 2012

Quick Christmas Craft Round-Up

To combat what was becoming a rather annoying Facebook game habit, I have taken up this blog. It gets me crafting and into the kitchen. It also keeps the guys at work happy when I bring in a baking project. This Christmas, I have been extra crafty and have been very "Pinspired". I thought I would share some of the crafts I have been doing these past few weeks.

These are gift tag/ornaments I made.  The Inspiration is here.

I loved how easy these recycled magazine bows were to make.  Inspiration here.

An adult size Tutu.  Inspiration here.

Something I put together and put up at work.  The guys love to come in and "Jingle My Bells".

When I first saw this, I knew I had to make it.

And finally, I made this garland but didn't take a photo of it so here is one of the snowmen.


Tuesday, September 25, 2012

Quiet Book

For my nephew's 2nd Birthday, I made him a quiet book.  Basically it is a fabric activity book for kids.  My Grandma Palmer made one for me when I was a kid and I really wanted to try my hand at it.  I have just started sewing so this project was a lot of trial and error.  It was also took a lot of time.

Here is the cover.  I made 4 different covers before I just settled for this one.  It just was not working how I had envisioned it.  It's made of felt and fabric paint.

This is the first page.  An apple tree.  The background is fabric with the tree, basket and apples being felt.  I sewed the tree onto the fabric and then hand-sewed the apples, using cotton balls as stuffing.  I attached Velcro to the apples and the tree.


Page 2 is my favorite.  The barn!  The barn is made of felt with bias tape as the white part.  The animals are also made of felt.


Page 3 is the color page.  The balloons are made of felt and I hand-stitched the lettering.


Page 4 is to show him how to tie a shoe.  The shoe is made of felt, with grommets put in and a regular shoelace.


Page 5 I just drew numbers and then stitched on the number of buttons per number.  I did this on a road trip!


The last page is a road page made of felt.  There is a garage where 2 cars fit and a large stop sign.