I love slow cooker recipes. I can throw them together before I leave for work and when I come home my house smells wonderful and dinner is ready. I found this recipe here and adapted it for our taste.
6 Chicken Tenders
3 lbs Fingerling Potatoes
1 cup Italian Dressing
2 tbsp Italian Seasoning
1/2 cup Parmesan Cheese
Coat the slow cooker crock with non-stick cooking spray. Place the chicken in the bottom of the crock. Sprinkle with half of the seasoning, half the dressing and half the cheese. Cut the potatoes into bite size pieces and layer on top of the chicken. Sprinkle the remaining seasoning, dressing and cheese on top. Cook on low for 7 hours.
Thursday, September 13, 2012
Sunday, September 2, 2012
Buttermilk "Fried" Chicken
I call this "fried" chicken because you fry it and then finish it in the oven. We strictly use thighs because it's our preferred piece and I can usually get it for 79¢/lb. I will give you a list of ingredients and what I did but there are no measurements, use your judgement and season to your taste.
Buttermilk "Fried" Chicken
Ingredients:
Buttermilk
Flour
Cornmeal
Johnny's Seasoning Salt
Cayenne Pepper
Baking Soda
Oil
Directions:
Place all the chicken in a container with a tight lid and pour buttermilk over to just cover all the chicken. Put in the fridge to marinate for at least an hour, I always do overnight. In another container with a tight fitting lid, I mix a couple cups of flour, a cup or so of cornmeal, 10 or so shakes of Johnny's, about 2 tablespoons of baking soda, and a couple teaspoons of the cayenne pepper.
When ready to cook, I set up an assembly line. I always do it in the sink for spillage reasons. I place my large bowl of chicken and buttermilk in the first sink, my container of breading in the second sink and a sheet pan with a cooling rack on the counter next to it. Then, on the stove, I set up my cast iron, enamel coated, pot with a thermometer in it. I fill it about 1/2 an inch with veg oil or even better, Crisco and let it heat up to 375. This was about an 8 on my stove's dial. I preheat the oven to 400 and set another sheet pan with a cooling rack next to the pot.
I take 2 pieces of the chicken, place them in the breading container, secure the lid and shake it up. After about 10 seconds, remove the chicken to the first sheet pan with cooling rack. I usually do as much as will fit on the pan and then head over to the stove. When the oil has reached 375, I place about 3 pieces into the pan, skin side down. This will depend on the size of your pan and depth. Mine is really deep and I had virtually no splatter. I cook it about 5 minutes on the first side and flip it over to cook 2 more minutes on the other side. Then I take it out and place it on the second sheet pan and cooling rack. Once the second pan is full, I put it in the 400 degree oven for about 20 minutes. Again, this will depend on the size of your chicken, so after that time, check for doneness.
I didn't get a photo of my finished chicken but I promise you, it was delicious. We ave made this 10 or 15 times in the past few years. We always make extra so we can eat it for breakfast and lunch for a few days.
Buttermilk "Fried" Chicken
Ingredients:
Buttermilk
Flour
Cornmeal
Johnny's Seasoning Salt
Cayenne Pepper
Baking Soda
Oil
Directions:
Place all the chicken in a container with a tight lid and pour buttermilk over to just cover all the chicken. Put in the fridge to marinate for at least an hour, I always do overnight. In another container with a tight fitting lid, I mix a couple cups of flour, a cup or so of cornmeal, 10 or so shakes of Johnny's, about 2 tablespoons of baking soda, and a couple teaspoons of the cayenne pepper.
When ready to cook, I set up an assembly line. I always do it in the sink for spillage reasons. I place my large bowl of chicken and buttermilk in the first sink, my container of breading in the second sink and a sheet pan with a cooling rack on the counter next to it. Then, on the stove, I set up my cast iron, enamel coated, pot with a thermometer in it. I fill it about 1/2 an inch with veg oil or even better, Crisco and let it heat up to 375. This was about an 8 on my stove's dial. I preheat the oven to 400 and set another sheet pan with a cooling rack next to the pot.
I take 2 pieces of the chicken, place them in the breading container, secure the lid and shake it up. After about 10 seconds, remove the chicken to the first sheet pan with cooling rack. I usually do as much as will fit on the pan and then head over to the stove. When the oil has reached 375, I place about 3 pieces into the pan, skin side down. This will depend on the size of your pan and depth. Mine is really deep and I had virtually no splatter. I cook it about 5 minutes on the first side and flip it over to cook 2 more minutes on the other side. Then I take it out and place it on the second sheet pan and cooling rack. Once the second pan is full, I put it in the 400 degree oven for about 20 minutes. Again, this will depend on the size of your chicken, so after that time, check for doneness.
I didn't get a photo of my finished chicken but I promise you, it was delicious. We ave made this 10 or 15 times in the past few years. We always make extra so we can eat it for breakfast and lunch for a few days.
Thursday, August 30, 2012
Only 116 Days Til Christmas
Laying in bed last night, my mind drifted to Christmas. Then the panic
set in. It's almost September, which means Christmas is right around
the corner. I am a planner. Usually by this time, I have lists made,
days scheduled and at least half my presents bought and stored in my
closet. I hadn't even thought about it until last night and I feel
behind already. It seems the older I get, the less time I feel like I
have. The days haven't gotten shorter and neither have the weeks months
or years. So why do I feel this way? Needless to say, I couldn't
sleep until I had at least started my list. I will just quickly share
how I set up my spreadsheet and maybe you too can get a jump start on
your holiday planning.
Its really basic. My Column Headings are:
Recipient Gift Bought Wrapped
Whenever someone gives me an idea of what they want, I just enter in and once it is bought, I place a check mark in that box. It is amazing how checking off those boxes can make you feel accomplished.
Hope this has helped you out a little bit, I know I feel better and am online shopping as I post this. I am having camera issues so that's why I haven't posted anything new lately. I do have an awesome Fried Chicken recipe to share and in preparation for my Bunko hosting duties next month, I will be trying out a bunch of other new recipes. Stay Tuned!
Its really basic. My Column Headings are:
Recipient Gift Bought Wrapped
Whenever someone gives me an idea of what they want, I just enter in and once it is bought, I place a check mark in that box. It is amazing how checking off those boxes can make you feel accomplished.
Hope this has helped you out a little bit, I know I feel better and am online shopping as I post this. I am having camera issues so that's why I haven't posted anything new lately. I do have an awesome Fried Chicken recipe to share and in preparation for my Bunko hosting duties next month, I will be trying out a bunch of other new recipes. Stay Tuned!
Thursday, August 16, 2012
Hawaiian Pineapple Pork
I don't really like to follow recipes so its a tad bit ironic that half my blog is devoted to recipes. So I say, start here and create your own flavors. I read a super simple recipe for Hawaiian Crock Pot Chicken that used a bottled sauce, chicken breast and pineapple. I read the ingredients of the bottled sauce and instead of spending $6 for it, I made my own with things I already had on hand.
Hawaiian Pineapple Pork
3 tbsp sugar
1/3 cup soy sauce
2 cups chicken broth
1 tbsp garlic
1 can pineapple chunks
2-3 lb pork roast
In the Crock Pot, I mixed the sugar, soy sauce, broth, garlic and the juice from the can of pineapple. I then added the frozen pork roast, poured the pineapple chunks on top and set my timer for 8 hours on low. Serve over rice.
When I got home, the house smelled wonderful and I was so looking forward to dinner. Unfortunately I felt the sauce on this was too thin. I didn't play with it because I was hungry when I got home but here are some suggestions I have to make it better, and if you try it, let me know.
-reduce the chicken broth to 1 cup or less (I am always paranoid about stuff drying out)
-up the soy sauce to 1/2 cup
-use more pineapple juice
The pork makes juice of its own as it cooks and my sauce never thickened. I have, in the past, used a slurry of corn starch and cold water to thicken. It really works. Just turn the crock pot to high and let it go for about 30 minutes. I hope to update this recipe soon with maybe a picture but it really is hard to make stuff that comes out of the crock pot look appetizing.
Hawaiian Pineapple Pork
3 tbsp sugar
1/3 cup soy sauce
2 cups chicken broth
1 tbsp garlic
1 can pineapple chunks
2-3 lb pork roast
In the Crock Pot, I mixed the sugar, soy sauce, broth, garlic and the juice from the can of pineapple. I then added the frozen pork roast, poured the pineapple chunks on top and set my timer for 8 hours on low. Serve over rice.
When I got home, the house smelled wonderful and I was so looking forward to dinner. Unfortunately I felt the sauce on this was too thin. I didn't play with it because I was hungry when I got home but here are some suggestions I have to make it better, and if you try it, let me know.
-reduce the chicken broth to 1 cup or less (I am always paranoid about stuff drying out)
-up the soy sauce to 1/2 cup
-use more pineapple juice
The pork makes juice of its own as it cooks and my sauce never thickened. I have, in the past, used a slurry of corn starch and cold water to thicken. It really works. Just turn the crock pot to high and let it go for about 30 minutes. I hope to update this recipe soon with maybe a picture but it really is hard to make stuff that comes out of the crock pot look appetizing.
Wednesday, August 15, 2012
Crafting Projects
Right now I am working on a secret project for my nephew's 2nd Birthday at the end of September. Most of my Crafting time is being spent on it but I don't wanna spoil the surprise so until I give it to him, this blog will mostly be recipes I am trying. I also have some family coming in from Iowa so I may include some of our activities with them on here. Until next time...
Tuesday, August 7, 2012
Hello Kitty Tote Bag Tutorial
We got invited to a Hello Kitty Pool Party for an awesome little girl who was turning 4 and I knew I wanted to make her something special. I just recently have taken up sewing and while my first purse was not a complete fail, I would never give it to someone else.
I headed down to JoAnn Fabrics to see if they had any Hello Kitty material. I got lucky in that the Character fabrics were 30% off that week. I picked out a really sweet pink paisley print for the lining, some bias tape for the trim and webbing for the handles. $70 and 2 hours later, I was headed home with tons of stuff. I can really lose track of time in there. So much to look at.
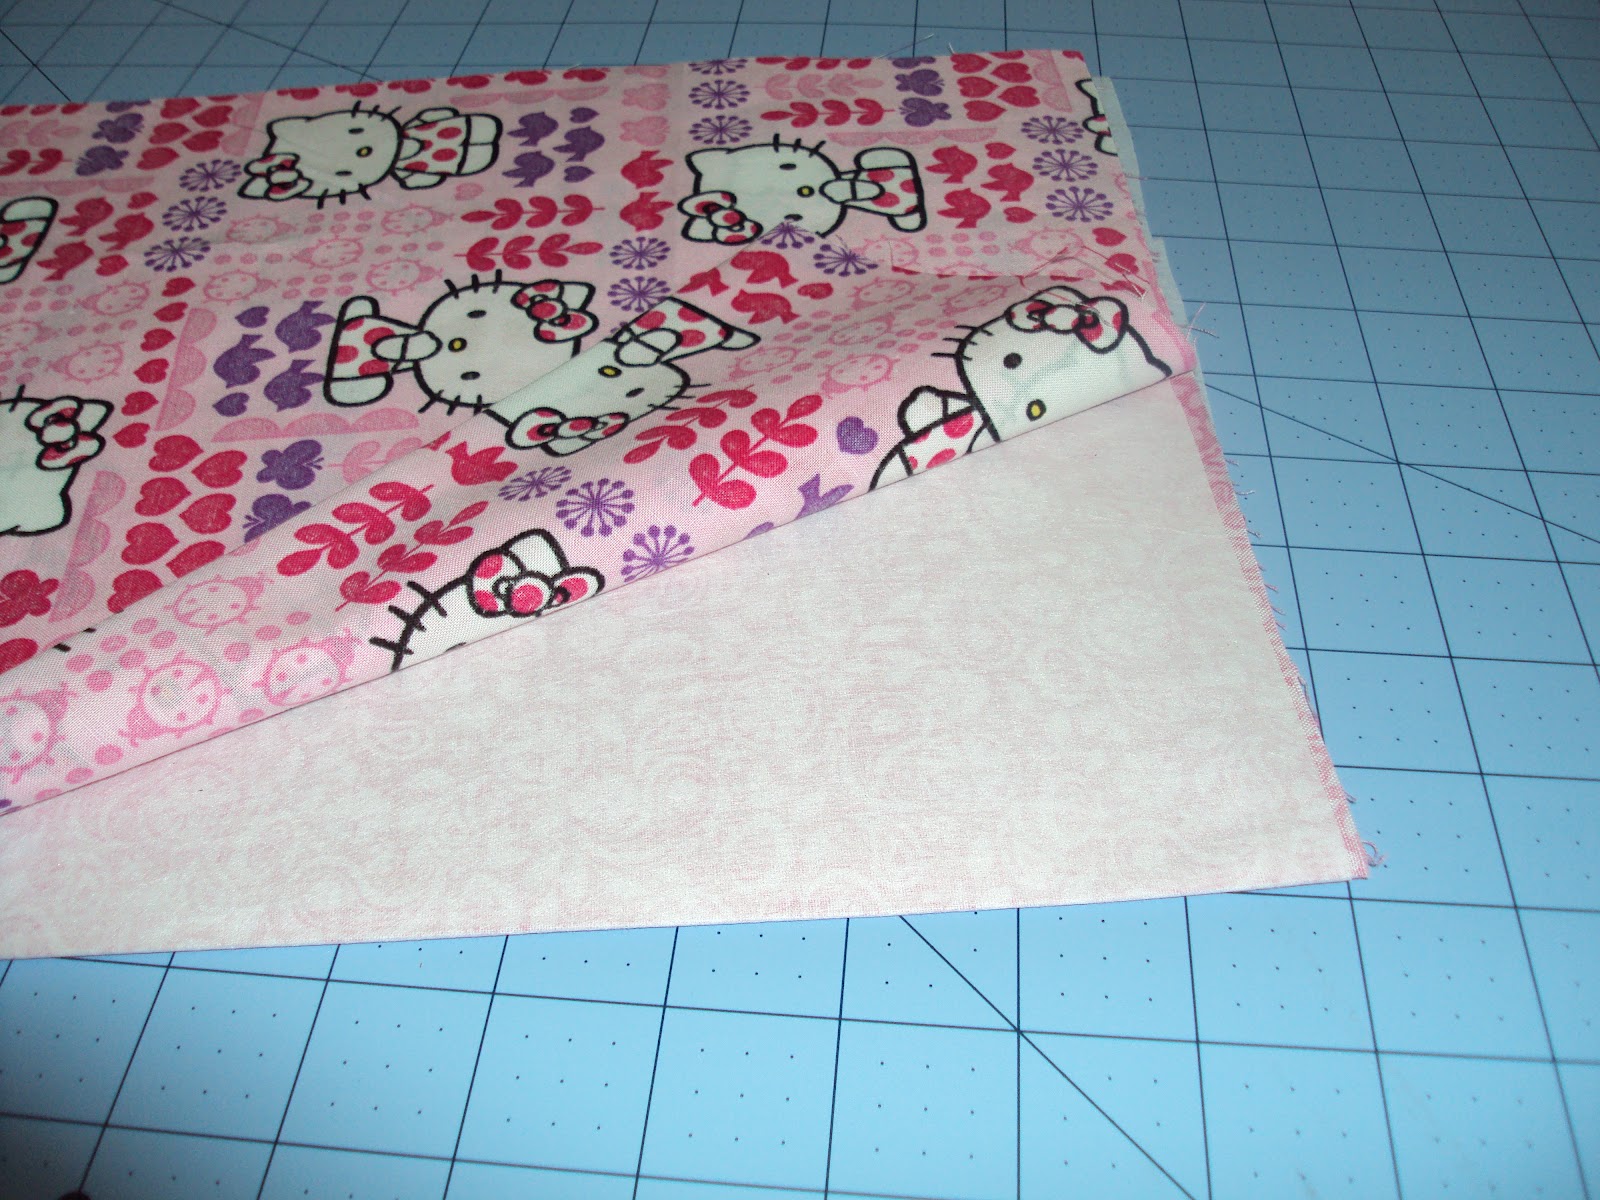
With the outside and lining fabric folded in half, I cut a 12" x 14" piece. Technically, when unfolded, it would be 24" long. I then cut one piece of interfacing to match.
I attached the interfacing to the lining fabric and pressed it right side in. I did the same with the outside fabric. I then stacked the lining and outside fabric on top of one another. It should be interfacing, lining face up, lining face down, interfacing, outside face up, outside face down.
I stitched all the way up both sides and flipped it right side out. You should have the lining inside and the outside where it needs to be with interfacing in between them. I then took extra wide, double fold bias tape and slipped it over the top edge and pinned it in place.
I then ran a seam around the top edge, connecting the bias tape to the bag. Now the bag has a cute trim top.
Next, I measured out the handle lengths, cut them and put fray stop on all the ends, just to make sure they didn't come apart. I then pinned the handle in place. I first sewed a square around the edge of them to secure them, then came in and stitched an "x" across them for extra stability.
And that's it, the bag is done. I slipped in a few Hello Kitty items and it was off to the pool for us.
Thanks to my sister for the use of her camera after mine died and also letting me use her house to do this project.
I headed down to JoAnn Fabrics to see if they had any Hello Kitty material. I got lucky in that the Character fabrics were 30% off that week. I picked out a really sweet pink paisley print for the lining, some bias tape for the trim and webbing for the handles. $70 and 2 hours later, I was headed home with tons of stuff. I can really lose track of time in there. So much to look at.
With the outside and lining fabric folded in half, I cut a 12" x 14" piece. Technically, when unfolded, it would be 24" long. I then cut one piece of interfacing to match.
I attached the interfacing to the lining fabric and pressed it right side in. I did the same with the outside fabric. I then stacked the lining and outside fabric on top of one another. It should be interfacing, lining face up, lining face down, interfacing, outside face up, outside face down.
I stitched all the way up both sides and flipped it right side out. You should have the lining inside and the outside where it needs to be with interfacing in between them. I then took extra wide, double fold bias tape and slipped it over the top edge and pinned it in place.
I then ran a seam around the top edge, connecting the bias tape to the bag. Now the bag has a cute trim top.
Next, I measured out the handle lengths, cut them and put fray stop on all the ends, just to make sure they didn't come apart. I then pinned the handle in place. I first sewed a square around the edge of them to secure them, then came in and stitched an "x" across them for extra stability.
And that's it, the bag is done. I slipped in a few Hello Kitty items and it was off to the pool for us.
Thanks to my sister for the use of her camera after mine died and also letting me use her house to do this project.
Thursday, August 2, 2012
Italian Style Meatballs
We had planned on making homemade pizzas for dinner but Safeway was out of our preferred dough so I had to improvise. I had pinned a recipe recently that turned out to just be a photo with a description for some meatballs. I started there but ended up making them my own.
Italian Style Meatballs
4 eggs
1 cup milk
1 cup freshly grated Parmesan cheese
2 tablespoons Italian Seasoning
1 teaspoon black pepper
1 tablespoon of minced garlic
2 cups cracker crumbs (I used 1 sleeve of saltines)
3 lbs ground beef
Mix eggs, cheese, seasonings and crackers in a large bowl.
Add the ground beef and mix together with your hands, there is just no other way to do it. (I used some gloves I took from work.) I used my largest scooper/disher and made balls that I rolled in my hand and then put them on a sheet pan lined with parchment paper.
A note about the Ground Beef: We ground our own hamburger out of a top sirloin slab we got for a great price at Cash & Carry. It tastes fantastic and has little to no fat in it.
Bake the meatballs at 350 for 30 minutes of until cooked all the way through. Mine were done in 30 but I left them in for about 35 so they got just a little browner. This large batch made 35 large meatballs. I served these as the main dish without sauce, just because we don't really like tomato sauce.
Italian Style Meatballs
4 eggs
1 cup milk
1 cup freshly grated Parmesan cheese
2 tablespoons Italian Seasoning
1 teaspoon black pepper
1 tablespoon of minced garlic
2 cups cracker crumbs (I used 1 sleeve of saltines)
3 lbs ground beef
Mix eggs, cheese, seasonings and crackers in a large bowl.
Add the ground beef and mix together with your hands, there is just no other way to do it. (I used some gloves I took from work.) I used my largest scooper/disher and made balls that I rolled in my hand and then put them on a sheet pan lined with parchment paper.
A note about the Ground Beef: We ground our own hamburger out of a top sirloin slab we got for a great price at Cash & Carry. It tastes fantastic and has little to no fat in it.
Bake the meatballs at 350 for 30 minutes of until cooked all the way through. Mine were done in 30 but I left them in for about 35 so they got just a little browner. This large batch made 35 large meatballs. I served these as the main dish without sauce, just because we don't really like tomato sauce.
Subscribe to:
Posts (Atom)